Category Archives: Health & Fitness

Sausage and Vegetable Casserole

I apparently have two speeds when it comes to this blog, over productive and complete slacker. I truly apologize for that.

It’s been a crazy few weeks. Between snow storms, everyday tasks and studying for my certification, I’ve been highly overwhelmed and stressed. When I get that way, I try to remove things from plate that aren’t essential to day to day living, so blogging tends to take a back burner, which I hate, because I enjoy doing it.

With that, I’ve still been in the kitchen and sticking with clean eating (with the exception of the Papa John’s Pizza and the burger I had while at Super Bowl Boulevard the other day – more on that soon) and I have a new recipe to share with you!

I found the inspiration for it on Pinterest of course. It’s more like a crustless quiche than a casserole but I’ve never made a quiche so I can’t say for sure, therefore we shall call it a casserole.

Sausage and Vegetable Casserole

Sausage and Vegetable CasseroleIngredients:
1lb Italian sweet sausage (you can use hot if you prefer)
¾ lb broccoli florets (about 4 cups)
2 medium zucchini, sliced into ¼-inch thick rounds
½ medium onion, finely chopped
1 small pepper (any color), chopped
1 tablespoon olive oil
¾ teaspoon fine grain sea salt, divided
¼ teaspoon ground black pepper
A pinch of red pepper flakes
3 free-range organic eggs
½ cup milk (you can use non dairy)
A handful of fresh basil, chopped
A pinch ground nutmeg
3 tablespoons grated Parmesan cheese

Directions:
1. Preheat oven to 350°F.
2. Place sausage on a baking sheet and roast for about 30 mins (Turn them halfway through cooking. Slice into 1/4 round pieces, like the zucchini)
3. Grease an 8×8-inch baking dish and set aside.
4. Heat the olive oil in a large skillet over medium-high heat. Add onions and a pinch of salt and saute for about 2 to 3 minutes until translucent. Add broccoli florets, zucchini, pepper, black pepper, ½ teaspoon of salt, red pepper flakes and about ¼ cup of water.
5. Cover with a lid and cook for about 15 to 20 minutes stirring often. The vegetables should brown a bit and must be thoroughly cooked, but still retain some of their crunchiness. Turn off the heat and let cool for 5 minutes.
6. In a large bowl whisk eggs, milk, ¼ tsp of salt and nutmeg for a couple of minutes until fluffy. Add chopped basil and stir to combine.
7. Add the sausage and vegetables to baking dish and spread them on an even layer. With the back of a spoon press them down gently.
8. Pour the egg mixture over the vegetables and sprinkle with Parmesan cheese (if desired).
9. Bake in the oven for about 30 minutes, until a skewer inserted into the center comes out clean.

This was a quick a simple recipe to make. You could add any vegetables you have on hand to it and you could even use chicken if you prefer. I was craving sausage and peppers but I didn’t want to have bread or pasta, so this worked out perfect.

I haven’t tried too many new recipes lately. Since I’ve been so pressed for time, I’ve been sticking with what I know and keeping meals very simple.

If you have tried any new recipes that you loved, please send me a link to them! I’m always looking to try new things.

blog sig

1 Comment

Filed under Health & Fitness, Main Course, Recipes

{Slow Cooker Recipe} Asian Five-Spice Pulled Pork

There are days that I don’t know what I would do without my slow cooker. Those days are usually Mondays. I don’t know what it is about Monday that usually leaves me running around like a chicken with their head cut off. Maybe it’s getting back into that weekday routine after being relaxed all weekend, or maybe it’s because I tend to cram everything humanly possible into the few short hours that the kids are in school. My guess is a combination of the two, but thankfully, the invention of the slow cooker makes one Monday task an easy one.

As I mentioned in my Eating Healthy On A Budget post, I like to purchase meat in bulk. I have staple meats that are always on hand in my freezer, ground beef, pork loin, chicken thighs and chuck roasts. These are staples for me because they can be prepared using different cooking methods, and are perfect for tossing into the slow cooker while still frozen!

Sometimes I plan my week with grand intentions of trying tons of new recipes, but then I wake up with a headache, end up having to go out somewhere or just flat out don’t feel like cooking (I know, that last one is crazy, but it happens from time to time). Those are the times I thankfully for my supply of frozen meat options, my slow cooker and my collection of recipes on Pinterest!

This recipe is actually intended for pork ribs, but I didn’t have pork ribs…I had a pork loin roast, so I figured why not?!

Asian Five-Spice Pulled Pork
Recipe Inspired by The Clothes Make The Girl

Asain Five-Spice Pulled PorkIngredients:
2-3lb pork loin roast
2 tsps Chinese five-spice powder
1 tsp garlic powder (I used a garlic pepper combo)
2 Tbsps apple cider vinegar
2 Tbsps coconut aminos
1 Tbsp tomato paste
salt and pepper
1 sliced jalapeno (optional – I used some jalapeno hot sauce because I didn’t have a fresh jalapeno on hand)

Directions:
1. In a small bowl, mix together the salt, pepper, Chinese five-spice, and garlic powder, then massage the mixture onto the pork.
2. If using the jalapeno, toss the sliced piece into the bottom of the slow cooker. Add the vinegar, coconut aminos and tomato paste. Stir well to combine the tomato paste with the liquids.
3. Add the pork roast and cook on low for about 8-10 hours.
4. When the pork is done, shred and mix with the juices in the slow cooker. Serve.

This pork had a wonderful, sweet flavor with just a hint of spice from the jalapeno. I served this with sweet potato mash and sauteed spinach, but this is yet another dish that would work perfect as a lettuce wrap. There are really very few meats that wouldn’t work well as a lettuce wrap, right?!

I’ve clearly been on a Asian kick with my meals this week. I think it might just be an excuse to eat lettuce wraps and Sriracha, because that is exactly how I used the left overs from this meal today.

Do you own a slow cooker? If so, do you use it a lot or does it just sit on a shelf in the pantry?

blog sig

Leave a comment

Filed under Health & Fitness, Main Course, Recipes

Easy Korean Style Beef

Yesterday was one of those days where time just got away from me. I meant to do my meal planning and some meal prepping, but I ended up taking down the Christmas tree and cleaning up the living-room. Before I knew it, the Broncos vs. Chargers game was on and I still didn’t know what I was cooking for dinner. These are the times I am thankful for Pinterest!

I opened up my laptop, plugged in the words healthy, ground beef and recipes and I had plenty of options to choose from. I knew right off the bat that chili was not an option since Mike is not a fan of it. I was not in the mood for red sauce so meatballs were out. Thankfully I stumbled on this recipe inspired by Korean Bulgogi, which is traditionally made using thin slices of marinated beef.

Easy Korean Style Beef
Recipe adapted from Kim Kim Cooking
Serves 4

easy korean style beefIngredients:
1 pound lean grounded beef
1 tsp olive or coconut oil
1 tsp chopped garlic
1 tsp chopped ginger
1/4 cup soy sauce or coconut aminos
1/4 cup brown sugar
1/4 cup water

Directions:
1. In a pan or wok, add oil and heat over medium heat.
2. Add the garlic and ginger, cook for about 2 minutes.
3. Add beef, stir well.
4. Add brown sugar, soy sauce, and water. Stir will to mix with the beef.
5. Cook for 7 minutes over medium-high heat, until cooked through.

This meal was super quick to prepare and cook. I made some jasmine rice to serve this over, and I added snap peas to the pan as I cooked the beef. Of course I topped everything with Sriracha, because…..Sriracha! The Sriracha actually balanced out the sweetness of this dish really well. Today I had the left over beef and snap peas as lettuce wraps for lunch, and that was a really yummy too!

Meals like this just show that you don’t have to spend a ton of money or time in the kitchen to have a healthy meal. What is your favorite quick, healthy meal?

blog sig

Leave a comment

Filed under Health & Fitness, Main Course, Recipes

Eating Healthy On A Budget

Eating Healthy on a Budget

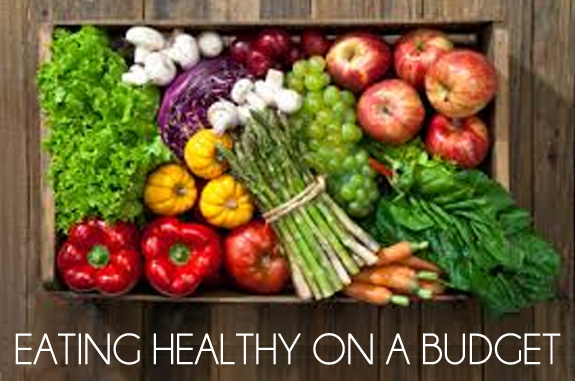
If you are like me, you don’t have a ton of extra cash and that money tree you attempted to plant last spring just never bloomed.

One of the most common things I hear from people is “There is no way we can afford to eat healthy on our food budget.” I get it! I really do. I lost my job almost a year ago and while I didn’t make a ton of money, it helped to cover things like groceries, especially once I switched us to organic produce and grass-fed meats. Now I’m forced to really think about where we spend our money and quite honestly, we don’t go out to eat as often (it was just hindering my goals anyway) and we were forced to prioritize where our money went. Groceries are more important than almost anything I can think of (after the mortgage, car payment and utilities, of course) so in my case, that is where my extra money is allotted to.

So how do I feed my family healthy foods without breaking the bank? Well…. here are a few of the techniques I’ve been using, as well as a few I would like to begin implementing soon.

1. Meal Planning: I’ve spoken about meal planning a little bit on here before. I’ll sit down and figure out a weeks worth of dinners (with enough leftovers for Mike to take to work) and make a shopping list based on them. I usually try to choose recipes with similar ingredients but different flavor profiles, so I can buy items in bulk and we don’t get bored eating the same thing over and over. The upside of meal planning is that you are creating a plan. This plan helps you to save money at the grocery store (as long as you stick to the list), plus you’ll save time in the kitchen because you’ll know what you are cooking each day. You will also save money by being prepared because you’ll have dinner on hand and you won’t need to order a pizza or go to the drive-thru. As much as I love pizza and a good greasy burger with fries from time to time, they hold very little nutritional value, but they have a decent sized price tag when feeding a family of four.

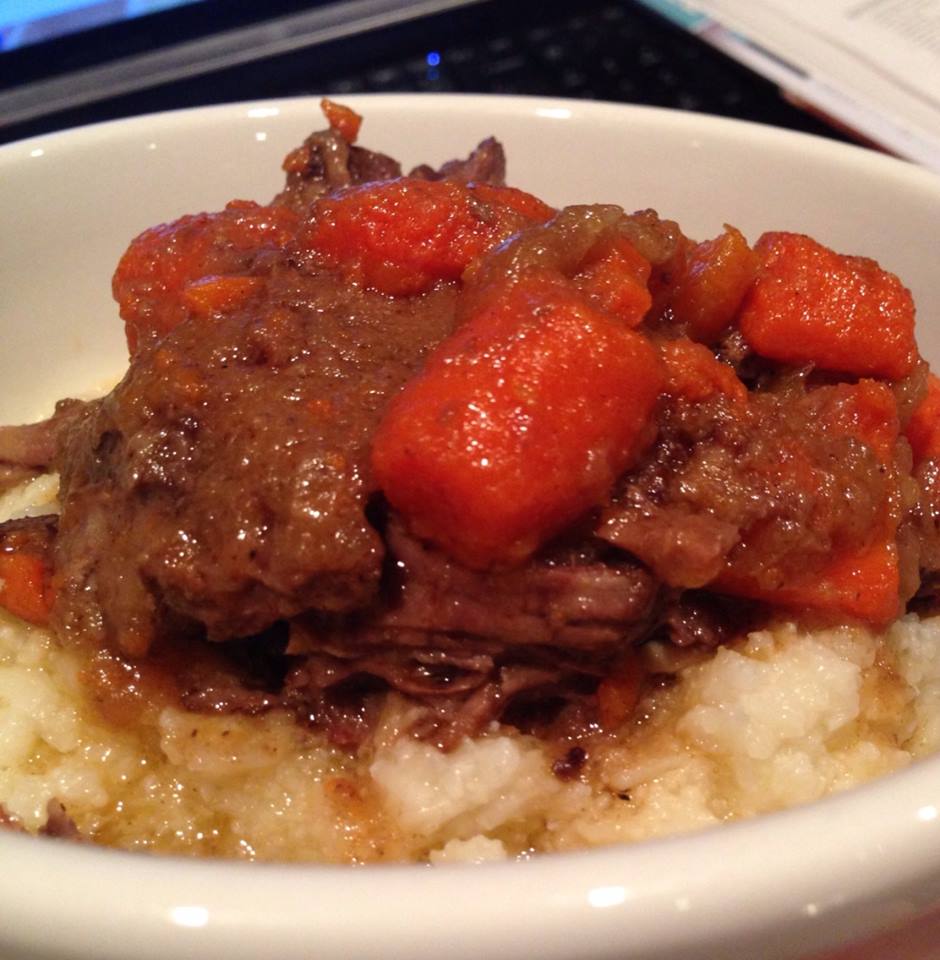
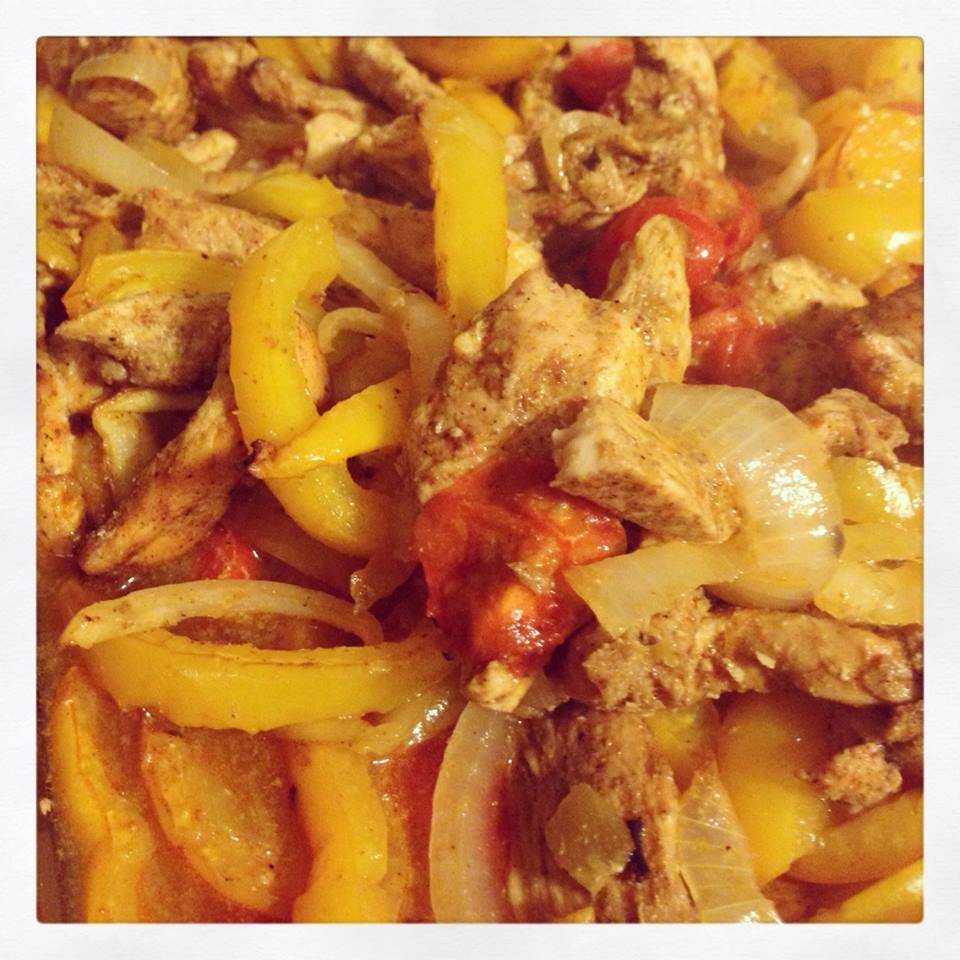
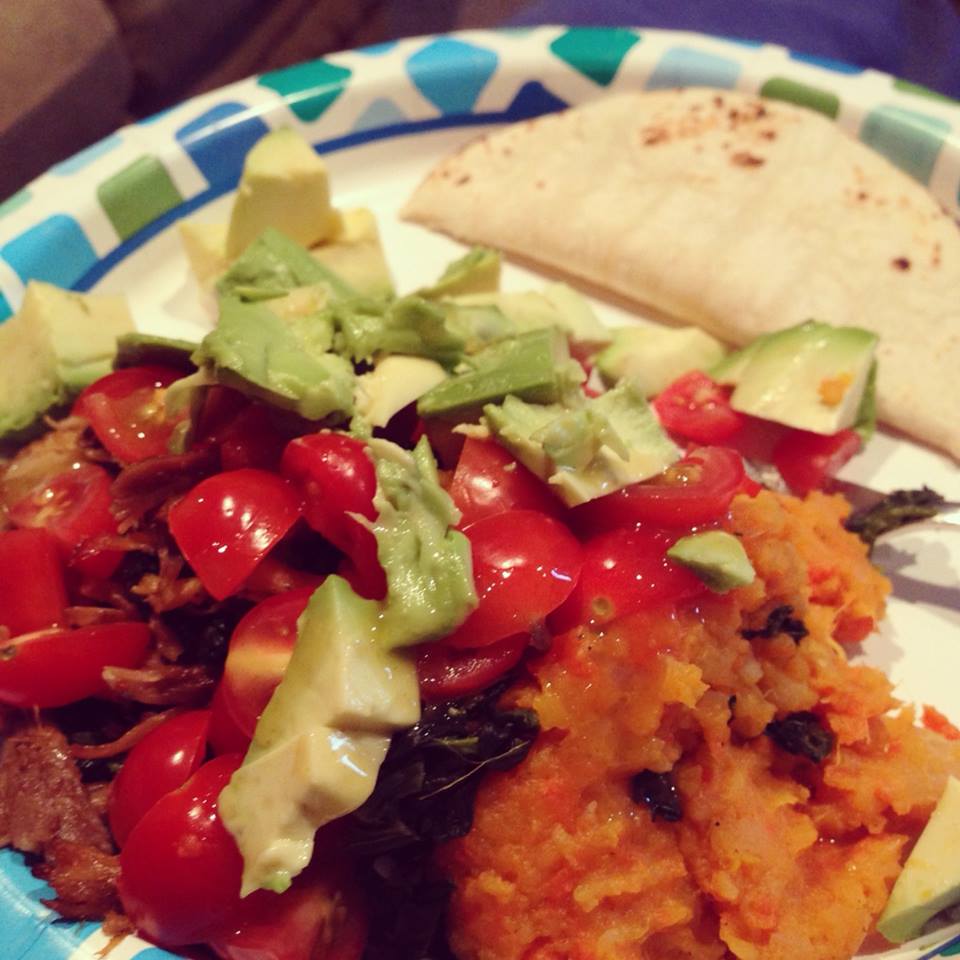
2. Meal Prep: Many people meal prep these days. You know it’s becoming popular when Rachel Ray makes a cookbook and show about the topic, right?!  (She has some good options and ideas on the show but she tends to be heavy handed on the cheese and oil, so please adjust those recipes to fit your goals if you watch that show or have the book.) Meal prepping is taking your meal planning a step further. You do a bulk grocery shopping, lay out your recipes and then have a marathon cooking session, usually on a Sunday, so you are all set for the week. There are two different approaches to this that I have seen. Some follow recipes for casseroles or slow cooker meals and prepare everything to be either tossed into the slow cooker the morning they plan to eat that meal or reheat the casserole when they get home from work on a particular day. The other method is to roast, steam or sautee large batches of vegetables, grill, roast or sautee chicken, ground beef or other proteins and cook large batches of rice or pasta. They use a general seasoning (usually just salt and pepper) to the foods to keep them generic, then when packaging them into plastic containers (try to make sure these are BPA-free) they may add different seasoning and combinations or sides to change the taste profile of the meals. Both techniques are excellent, I think it just depends on your lifestyle to see which fits better. I tend to use both, since I like to have options ready for me at lunchtime, but I also need full meals for dinner. Here are two of my favorite meal prep lunches.

3. Buy Food in Bulk: I don’t think I know anyone who doesn’t have a membership to Sam’s Club, Costco or some other warehouse club. If you don’t have one, you probably have a friend or family member who does, so ask them if they would mind taking you one day. While these stores don’t always have grass-fed meat and organic produce, I’m okay with that. As much as I would love to buy everything organic, grass-fed or free range, it’s just not possible and I take the time to wash non-organic produce well (make sure you use white vinegar mixed with water to remove the pesticides). Buying in bulk gives you a big bang for your buck. It may seem like a lot of money to lay out at once, but if you purchase items you use on a day to day basis, you’re going to save money in the long run. I tend to purchase nuts, oils, spices and produce there. I also like to stock up on meat. I save a ton of money by buying club packs of meat and then breaking them down and freezing them. I buy chicken thighs with the skin and bones and just remove them myself when I get home. I’ll buy thick boneless pork chops and slice them in half to make thinner ones because it saves a ton of money. Yes, it’s a little time consuming, but I save money and still get to feed my family real meals each night, so it’s worth it! If you use a lot of dried fruits, whole grain pastas, brown rice, quinoa, coconut or almond flour I would recommend looking for bulk options and purchasing them that way.

4. Shop The Reduced Produce Rack: Every grocery store has a reduced produce rack. These may not be THE freshest produce items in the store, but most of the time there is nothing wrong with them and they just get bumped back there to make room for the newest shipment. I use a lot of bananas so I always shop the reduced rack when I need them. Most of my bananas go into smoothies, so when I get them home, I take the peel off, toss them into a freezer bag and pop them into the freezer. I get ripe bananas for pennies compared to the green bunches that have to sit on the counter for days before they can be used. As a matter of fact, I purchase a lot of vegetables from here. Peppers are perfect because I just take them home, cut them up and toss them into a freezer bag as well. If they have spinach or green beans back there, grab them, par boil them and freeze them!

5. Buy Frozen: When vegetables are out of season, they cost more. What’s worse is that they cost more and they aren’t even really fresh. They’ve traveled halfway around the world to get to your local grocer store. Do yourself a favor and just buy frozen vegetables when they are out of season. Frozen veggies are usually picked and then flash frozen so they most likely have more nutritional value than the “fresh” produce that travel the world to get to you. They also go on sale all the time! Many grocery stores have their own brands and you’ll only pay around $1-$2 per bag. You can also keep an eye out for sales and manufacturer coupons and then stock up. I would be lost without my stock of frozen vegetables in my freezer!

6. Buy Locally: Buying seasonally is a huge money saver as I mentioned above in the reduced produce and buy frozen section, but so is buying locally! Spring is the best time because that is when many local farmers markets open up. In summer, they are in full swing and there is an abundance of fresh produce available. Talk to the local farmers, get to know them and ask questions. Many times their produce is only minimally sprayed (or not sprayed at all) but they can’t afford the organic certification. If you plan on buying in bulk, be sure to speak to them because they may be able to cut you a deal. To find local Farmer’s Markets and when they open near you, visit Local Harvest and Eat Well Guide.

7. Join A CSA: I have not yet joined a CSA (Community Supported Agriculture) but it’s something I’ll be looking into. CSA’s have become a popular way for consumers to buy local, seasonal food directly from a farmer. When you join a CSA you usually receive a box, bag or basket consisting of local, seasonal vegetables, but other farm products may be included. If you are a big fan of shopping at local farmers markets, joining a CSA might be a logical next step for you. For more info on CSA’s visit Local Harvest and Eat Well Guide.

8. Grow Your Own Food: I know not everyone has a yard but there are different options for growing your own food. I have tried my hand at this but I lack a green thumb. I seem to only have luck with herbs and it’s better than nothing. I found a website while lurking around on Pinterest called Square Foot Gardening and it’s something I plan on looking into more this season. I would love to be able to plant my summertime staple vegetables and be able to control the full growth process AND have the fresh from the vine when I need them. If you already grow your own vegetables, I would love to hear some of your tips and trick for keeping the squirrels away!

9. Use Whole Grains and Legumes: Unless you are following a Paleo or Gluten-Free lifestyle, using whole grains and legumes in your recipes will help you to stretch your dollar without sacrificing nutrition. They are filling and can be found in a ton of vegetarian recipes, so incorporating a “meatless monday” into your schedule can help cut back on the money you spend on meat, as well. I’m pretty sure if you are here and reading this far into the post, you know that white, processed pastas, breads and rice are not your best choices and that you should be opting for whole grain versions. Stock up on these in bulk and make them the stars of your dishes, but like everything in life… use them in moderation!

10. Avoid Processed Foods: While these foods seem like they fit into your budget easier, they leave your body nutritionally starved and begging for nutrients.  You end up eating more of these foods because your body is never truly satisfied by them due to the lack of nutrients. These over processed foods are filled with sugar, ingredients you can’t pronounce and unnatural food coloring. They are also designed to make you crave them, so you end up eating more, so what are you really saving by buying them?

When you do your grocery shopping, avoid the center aisles of the store. That is where the majority of the over processed foods are. I know that 10 for $10 seems like a budget saving deal, but in the long run, it is not unless we are talking plain ol’ frozen vegetables. All of those frozen diet entrees should be avoided like the plague. Ever flip one over and look at the ingredients?! It’s disgusting! They are full of gross additives and sodium. Skip them. Another area to skip is the yogurt in the dairy section. If it has a name like red velvet cake, boston cream pie or cherry cobbler, that means it is loaded with sugar. I don’t care if it says it is fat free. You can’t only look at one component of the ingredients. If you like yogurt, stick with plain greek yogurt and add your own fruit to it. Juice is another pitfall. Most commercial juices are full of sugar and additives. Your best bet is to purchase foods with less than 5 ingredients in them. If you can’t pronounce and ingredient, leave it in the store. Potatoes, strawberries, carrots, spinach, chicken and ground beef all have one single ingredient to them. That is the key to eating healthy and it is possible to do on a budget, you just have to plan a little more and be creative.

Here is list of produce you should try to purchase organic versions of because they are known to have the highest levels of pesticides:

  1. Peaches
  2. Apples
  3. Sweet bell peppers
  4. Celery
  5. Nectarines
  6. Strawberries
  7. Cherries
  8. Pears
  9. Grapes
  10. Imported spinach
  11. Lettuce
  12. Potatoes

Don’t worry if you can’t get the organic versions all the time, it’s not the end of the world. Just take the time to clean them properly with equal parts water and white vinegar or a commercial veggie wash. Pesticides are designed to withstand rain, so just rinsing them with water is not enough to remove them.

If you have any tips for eating healthy on a budget I would love to hear them! Please share them below or over on my Facebook Page.

blog sig


1 Comment

Filed under Health & Fitness, Recipes

{Slow Cooker Meal} Jerk Chicken

Yesterday afternoon, I was doing my workout and began debating what to make for dinner. I remembered I had a recipe for Jerk Chicken that I wanted to try. So as soon as I was done, I ran downstairs, mixed some recovery drink and began prepping my spices and chicken for cooking.

Now the recipe I found wasn’t a true Caribbean style jerk chicken, but it has spice and looked really tasty, so I had to give it a try.

Slow Cooker Jerk Chicken
Recipe from Ancestral Chef
Serves 6

jerk chickenIngredients:
12 chicken legs
4 teaspoons of salt
4 teaspoons of paprika
1 teaspoons of cayenne pepper (add more or less depending on how spicy you like your chicken)
2 teaspoons of onion powder
2 teaspoons of thyme
2 teaspoons of garlic powder
1 teaspoons of black pepper

Directions:
1. Mix all of your spices together in a bowl to make a rub for the chicken.
2. Rinse your chicken legs in cold water, then place into a bowl. Sprinkle the chicken with the spices and rub them into the meat thoroughly. Make sure you try to get it under the chicken skin, too.
3. Place your rubbed chicken into your slow cooker (no liquid is necessary to cook this dish)
4. Set the slow cooker on low heat and cook for 6 hours or until the chicken meat falls off the bone (slow cooker times and setting vary so adjust accordingly).
5. You can serve the chicken on the bone, or remove them since the meat falls off so easily.

This recipe made my kitchen smell amazing and was very moist and flavorful. I used the full teaspoon of cayenne pepper and didn’t find it to be very spicy, but feel free to use less if you are sensitive to spicy food. You could even substitute with other spices that are more traditional to the Caribbean style if that’s what you prefer. Play with it. Have fun! That’s what cooking should be about!

I served the chicken with some mashed cauliflower, and steamed snap peas. Everything was simple, quick and healthy, which is so important to me.

What kind of recipes do you tend to gravitate to? Do you like to try new things or do you tend to stick to what you know?

blog sig

Leave a comment

Filed under Health & Fitness, Main Course, Recipes

{Healthy Comfort Food} Pot Roast & Mashed Cauliflower

Thanks to the polar vortex nonsense, it’s been super frigid across the country and what is better on a cold day, than watching movies, cuddling under warm blankets and eating some yummy comfort food?!

For this recipe, I substituted the usual decadent, mashed potatoes for mashed cauliflower and I really enjoyed it!

Garlic Studded Pot Roast
Serves 6

pot roastIngredients:
1 boneless beef chuck roast (about 3 pounds)
5 cloves of garlic, peeled and cut in 1/2 lengthwise
2 teaspoons salt
1/2 teaspoon black pepper
2 Tbsps olive oil
1 large onion, roughly chopped
1 cup peeled and chopped carrots
1 cup chopped celery
2/3 beef stock or red wine

Directions:
1. Using the tip of a sharp paring knife, make 10 small slits deep all over the pot roast. Insert the garlic cloves as deep into the slits as possible.
2. Season the roast on all sides with the salt and pepper.
3. In a Dutch oven, heat the oil over high heat. Carefully add the meat and sear on all sides until well browned, 4 to 6 minutes per side.
4. Add the vegetables, carefully add the stock or wine and cover the pot.
5. Reduce the heat to low to medium-low and cook until the roast is very tender, about 3 to 3 1/2 hours. Turning 2 or 3 times during the cooking process. (Add a little more water, stock or wine as needed so that a little liquid always is on the bottom of the pan.)
6. Allow the meat to rest 10 minutes. Slice or pull the meat apart into serving pieces and serve with the vegetables over the mashed cauliflower (recipe below).

Mashed Cauliflower
Serves 6

Ingredients:
1 large head of cauliflower
2-4 Tablespoons pastured butter ( I used coconut oil because that’s what I had – you won’t need as much)
1 Tablespoon garlic salt
Salt and pepper to taste

Directions:
1. Cut the cauliflower into large pieces.
2. Place cauliflower in a pot of water. Make sure it is fully immersed.
3. Bring water to a boil. Let cauliflower cook for about 15 minutes. (It should be very easy to pierce it with a fork.)
4. Drain the water from pot. Leave cauliflower on low heat, and mash with a potato masher.
5. Add butter and seasonings.
6. Mix well. Serve hot.

I was a little unsure if Mike would like the mashed cauliflower, instead of traditional mashed potatoes, but he really enjoyed them and said he didn’t feel overstuffed like usual after eating dinner. That’s a big win to me…now if only I could get the kids to eat them…sigh!

Have you tried making your favorite comfort foods healthier? If so, what have you substituted?

blog sig

1 Comment

Filed under Health & Fitness, Main Course, Recipes

Baked Chicken Fajitas

Everyone has those nights when they need something quick and easy to make for dinner. You may not be into meal prepping yet (which is a life saver) or maybe you just don’t feel like eating what you prepped again, but you also don’t want to sabotage your healthy eating. This recipe is perfect for those nights!

Baked Chicken Fajitas
Serves 4

baked fajitasIngredients:
1 lb. boneless skinless chicken breasts, cut into thin strips
2 tbsps olive oil
2 tsp. ground cumin
2 tsp. chili powder
1/2 tsp mexican oregano
1/2 tsp garlic powder
1/4 teaspoon sea salt
a handful of cherry or grape tomatoes, cut in half
1 jalapeno, sliced (you can remove the seeds if you prefer less heat. I used a small can of fire roasted green chilies because I didn’t have a jalapeno on hand)
1 large onion, cut into thin strips
2 medium peppers, cut into thin strips (use any color you have on hand)

Directions:
1. Place the chicken strips in a gallon sized zippered bag.
2. In a small bowl combine the olive oil, cumin, chili powder, oregano, garlic powder, and salt. Sprinkle over chicken; toss to coat.
3. Put in the refrigerator to marinate 30 min. to overnight.
4. When ready to bake, Preheat the oven to 400 degrees, then coat a 13×9 baking dish with cooking spray and place the marinated chicken strips in.
5. Add tomatoes, jalapenos, onion and peppers to the dish and stir to combine.
6. Bake, uncovered, for 25-30 minutes or until chicken is no longer pink and vegetables are tender.

This recipe came in handy yesterday! I was busy studying for my midterm most of the day and didn’t think about dinner until late. Mike and I started working out together at night, so I was able to prep this, toss it in the oven and by the time we were done with our P90X3 workout, our post workout meal was ready and waiting! How perfect is that?!

If you are following a paleo or gluten-free lifestyle, serve these as lettuce wraps and top with a little guacamole, a squeeze of lime and hot sauce, if you desire. If you are non-paleo, but gluten-free, you can use white corn tortillas and if you are just eating clean, serve these with whole-grain tortillas and top as you wish. This is really a great recipe for entertaining too, since it is easy and healthy, but can fit different nutritional lifestyles with ease.

Do you have any healthy, easy, go-to recipes that you rely on when you’re short on time?

blog sig

2 Comments

Filed under Health & Fitness, Main Course, Recipes

Beef Bone Broth…Who Knew?!

While collecting recipes this past week, I finally decided to give bone broth a try. I’ve seen quite a few people on Instagram share photos of their crockpots loaded with bones, veggies and water, but I had no idea what the benefits of this broth were and why they were doing this. Then I decided to consult my good friend Google, since he always has the answers (he’s such a know it all…it’s a little obnoxious sometimes).

If like me, you are not aware of the benefits of consuming bone broth, please take a moment to READ THIS you’ll thank me after you do.

If you ARE familiar with bone broth, well….WHY DIDN’T YOU TELL ME ABOUT HOW AWESOME AND EASY IT IS?!

This is the recipe that I used for mine. I already have a chicken carcass in the freezer and plan on making a batch of chicken bone broth after I roast another chicken next week.

Slow Cooker Beef Bone Broth
Recipes from NomNomPaleo
Makes about 4 quarts

Bone BrothIngredients:
2 carrots, chopped medium
2 celery stalks, chopped medium
1 medium onion, chopped medium7 garlic cloves, smashed
3.5 lb of beef bones (I used beef marrow bones)
2 bay leaves
Kosher salt
2 tablespoons of apple cider vinegar
water

Directions:
1. Add the vegetables to the bottom of your slow cooker. Then place the beef bones on top.
2. Tuck the bay leaves between the bones, sprinkle with salt and then drizzle the bones with the apple cider vinegar.
3. Add enough water to cover everything.
4. Set your slow cooker to cook on low for 10 hours. (After speaking to some friends, I set mine for a second time and cooked it for 20 hours. After reading the above article, I’ll be cooking it even longer next time.)
5. When the broth is done, pour it through a fine strainer and discard the solids. (we gave our dog one of the bones as a treat)
6. Portion into tupperwares and place in the fridge. If your bones were fatty, you can skim off some of the fat after it separates and sets in the fridge. The broth will turn into a beef gelatin, so don’t be alarmed.

The broth will keep in the fridge for a few days or if you freeze it, it’ll last for several months.

So far I’ve tried heating up the broth and drinking it like a tea and I’ve also sauteed some veggies and then heated the broth with them to make a quick, healthy, lunchtime soup. From now one, I’ll be using this in place of boxed stock for all of my recipes as well. Why should I spend my hard earned pennies on boxed stock that isn’t as good for me as the liquid from the Gods?!

On a side note, Mike and I also started P90X3 last night, so keep an eye out for a review of it once we complete week 1!

Have you tried bone broth? If so, I’d love to hear anything different you do in your recipe. If you’re new to this, are you considering making it since reading this post?

blog sig

Leave a comment

Filed under Health & Fitness, Main Course, Recipes

Paleo, But Not Paleo

While I don’t follow a paleo lifestyle, I do appreciate many of the ideas behind it. I have never been a person to subscribe to just one lifestyle when it comes to food. I prefer to listen to my body, eat as clean as possible and try to stay balanced with my choices. I’m also not one for depriving myself. If I want pizza, I’m going to eat pizza. If I want a regular baked potato, I’m going to eat a regular baked potato and I may even put a little margarine on it even though I know it’s not healthy. I’m such a rebel!

Regardless of this, I have been trying a lot of paleo recipes lately. I do feel better when I eat clean and honestly, paleo is just a strict version of clean eating. I just don’t stress out if I only have soy sauce and not coconut aminos or if I have peanut butter and not almond butter. I have a limited budget for food and I do the best I can when shopping, however there are times that $6 for a jar of something just doesn’t work and that’s okay.

With that said, I got very excited when I found this recipe for Kotleti which are Ukrainian meat patties. It’s rare that you find recipes like this unless you specifically look for them (I don’t know why I haven’t before) but Mike is half Ukrainian and since his mom passed away when he was young, the only traditional recipe we have is her peirogi recipe, which we love. I enjoy showing the kids pieces of their heritage (even though they make a funny face at most food items) and I hope they will carry on the pierogi tradition when they grow up and have families of their own.

I prepared the Kotleti with a spiced roasted vegetable recipe I found and I was pleased with both, especially because they can be made during meal prep sessions.

Kotleti – Ukrainian Meat Patties
Recipe from A Teaspoon Of Rosemary

Kotleti and Roasted VegetablesIngredients
1 lb ground pork
1 lb ground beef
1 large onion, finely chopped
3 garlic cloves, minced
1 handful of parsley, finely chopped
1 tbsp salt
1 tsp pepper

Directions
1. Add all of the ingredients to a bowl and mix well using your hands, until everything is incorporated.
2. Wet your hands and shape a two inch ball of meat into an oval and then pat it gently to flatten it into a patty.
3. Heat a frying pan with a few tablespoons of olive oil to medium heat. Place about 4-5 patties into the pan. Do not overcrowd.
4. Flip the patties after a few minutes, once they have browned and repeat on the other side. Don’t worry if your patties are not cooked through all the way, they will continue to cook in the next step.
5. While the patties fry, put some water in another saucepan (just enough to cover the bottom) and set it next to the frying pan.
6. When the patties are browned on both sides, remove them with the spatula and place them closely in the saucepan with water, then cover.
7. Once all of the patties are browned and stacked in the saucepan with water, bring that saucepan to a boil, then reduce to a simmer and cover for 10-15 minutes. This will ensure all of the patties are cooked through while making them moist and tender.

____________________

Paleo Diet Roasted Vegetables
Recipe from AncestralChef.com

Ingredients
2 carrots, peeled
2 sweet potatoes, peeled
1 lb of Brussels sprouts
1/4 – 1/3 cup of cumin powder
1 tablespoon of turmeric powder
1 tablespoon of garlic powder
1 tablespoon of dried oregano
1/2 teaspoon of black pepper
1/2 tablespoon of sea salt (or to taste)
1/4 cup of coconut oil, melted

Directions
1. Preheat oven to 350F.
2. Chop up the peeled carrots and sweet potatoes into large chunks.
3. Boil the carrots, sweet potatoes and Brussels sprouts for 10 minutes.
4. Strain out the vegetables and place on a baking tray.
5. Sprinkle with the spices and melted coconut oil and rub everything together.
6. Roast in oven for 30 minutes until soft and slightly browned.

I will tell you that I drastically reduced the spices used in the roasted vegetables and I didn’t have tumeric on hand but they came out really yummy. While I normally just cut up my vegetables and toss them in the over for an hour to roast, I did like the reduced cooking time with boiling them first, even though it meant another pot to wash.

The other upside to the recipes I’ve been trying is that they have all been using similar ingredients, so it allows me to buy some vegetables in bulk and save some money.

Do you have heritage specific recipes that are a tradition in your family?

blog sig

Leave a comment

Filed under Health & Fitness, Main Course, Recipes

Back In The Kitchen and Loving It

As I posted yesterday, I’ve started off the New Year by collecting new recipes, heading out the grocery store to collect ingredients and with a focus on resetting my system to not feel the need to constantly consume sugar. So far things are going well with my sugar addition and I haven’t been rocking back and forth in a corner crying out for a cookie. I honestly believe that going back to clean eating and being aware of what I put into my body is making this process a lot easier.

The past 3 days I’ve been busy in the kitchen and I couldn’t be happier. The kitchen is truly my happy place, when I know what I want to do and I’m feeling inspired, which is the complete opposite of what I was feeling in there during the holidays (unless I was baking cookies, which is where the issues started, so I digress).

I have a major love for tacos and for sweet potatoes, so when I stumbled upon a recipe that included both, I knew I had to make it. This is also when I realized I’m running very low on spices in my pantry so if Mother Nature cooperates today, I’ll be going out to restock.

Taco Smash
Recipe from PaleoGirlKitchen.com
Serves 4

taco smash

I apologize for my lack of professional photography with my food photos. I promise to work on it this year.

Smash
2 sweet potatoes, peeled and cubed
1 carrot, peeled and cubed
1 small turnip, peeled and cubed
sea salt & pepper, to taste

Taco Meat
1 lb ground beef (grass fed is possible)
1 ½  tablespoons chili powder
1 teaspoon cumin
½ teaspoon garlic powder
½ teaspoon onion powder
½ teaspoon paprika
½ teaspoon crushed red pepper (adjust to fit you taste)

Toppings
2 small avocados, sliced
1 roma tomato, diced or cherry tomatoes
¼ cup cilantro, minced (if you don’t like cilantro use any lettuce or green you prefer)
⅓ cup white onion, diced
Your favorite hot sauce

Directions
1. Place sweet potato, carrots and turnip in a pot and cover with water. Bring the water to a boil, and cook for 20 minutes. Drain the mixture. Place them back in the pot or in a large bowl,  add the sea salt, and pepper. Mash them together.

2. In a medium frying pan over medium-high heat, brown the beef, breaking it up into crumbles. Mix in the chili powder, cumin, garlic powder, onion powder, paprika, and red pepper as the meat is browning. (If your meat is not lean, you may need to drain off some of the extra fat BEFORE adding your spices)

3. To assemble: put a scoop of smash on a plate. Top with ¼ of the meat mixture. Sprinkle with the toppings!

This recipe was quick and delicious! I was leery at first because I’ve never eaten, let alone cooked with turnips, but I really enjoyed the flavor of this smash. It had a nice sweet flavor to it which really balanced out the meat topping and all of the hot sauce that I like to use. I topped mine with some cherry tomatoes, avocado, hot sauce and a squeeze of lime. I also toasted a white corn tortilla (which gluten-free but not paleo) on the stove to go with it, but I honestly didn’t even need it. I think I prepared that just in case I wasn’t a fan of the recipe.

The smash can be used as a side dish with any type of protein so if you are not a fan of taco meat, at least make the smash and have it with some pot roast, chicken or any other protein of your liking.

What do you like to top your tacos with? I never thought I would enjoy a taco without sour cream and lots of cheddar cheese but now I couldn’t imagine using either of those.

blog sig

8 Comments

Filed under Health & Fitness, Main Course, Recipes